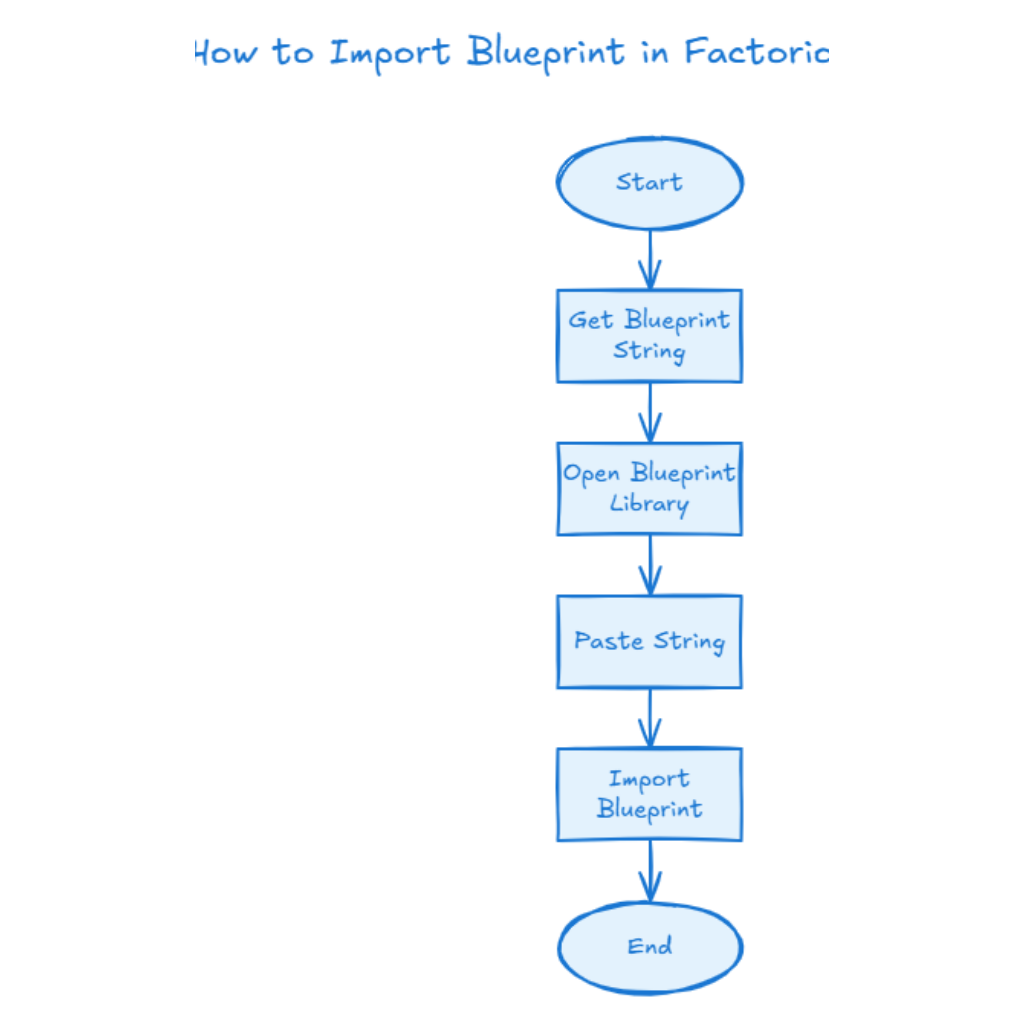
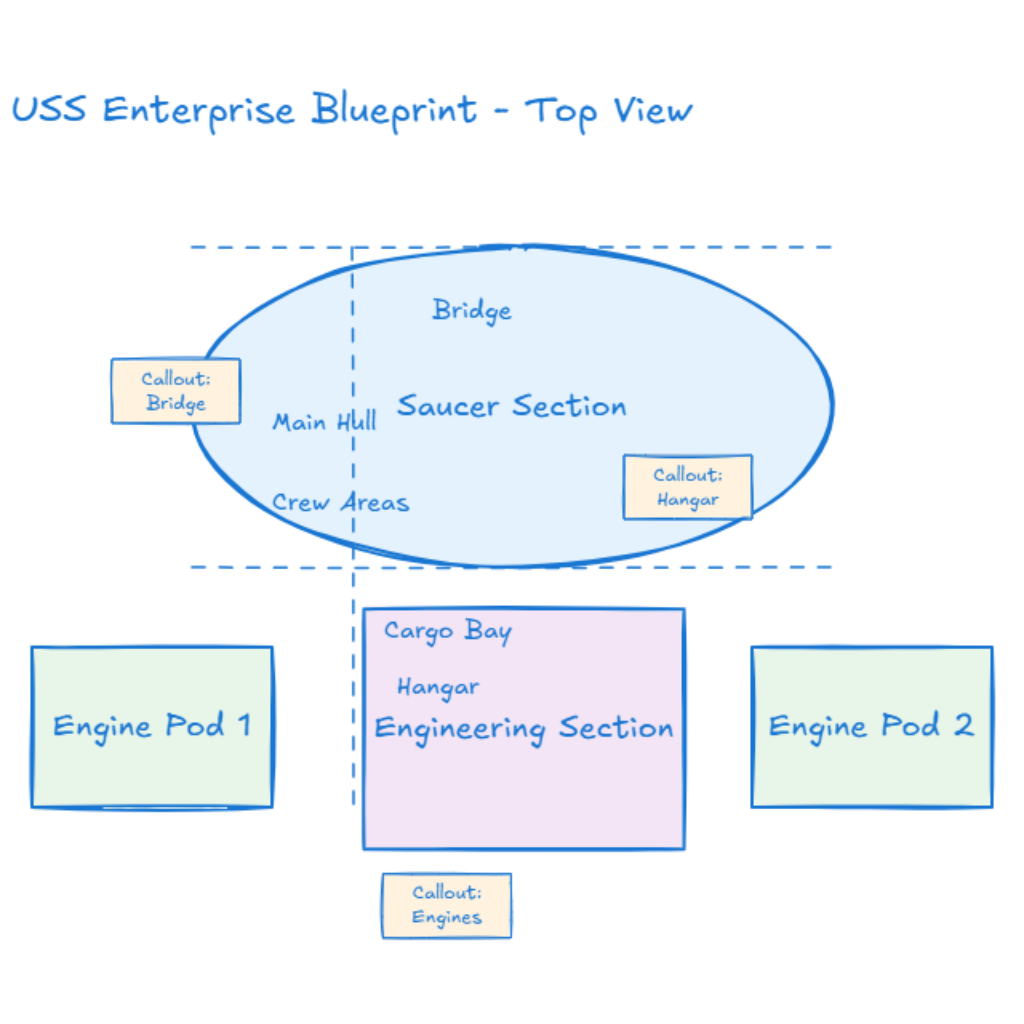
Create an Excalidraw hand drawn flowchart about blueprint anvil. Show a clear step by step flow that matches the topic. Use rectangles and arrows, simple layout, and a centered title. Use English labels, short words, and leave space between steps. Keep the tone gentle and clear. Add a start and end shape and keep the flow easy to read from top to bottom. Include key steps mentioned in the topic and keep each label short and simple.
Description
What is blueprint anvil
blueprint anvil is a simple topic about planning a step by step craft flow. It often means showing how a rough plan becomes a finished item through clear steps. Many people use it to keep a calm order for a workshop or a lesson. The topic is useful because a clear flow makes work feel steady and safe. A diagram can show each step from setup to finish and keep the pace gentle. With clear keywords, an AI tool can draw a flow that is easy to follow. This helps teams share a plan and helps new learners understand the process. It also helps set a calm pace and reduce simple mistakes. It can support a short demo or a longer lesson for a new group. It keeps focus on one step at a time when the work feels new.
When to use blueprint anvil diagram/charts
You can use blueprint anvil diagrams when you want a clear craft routine. Teachers use it to guide small classes without confusion. Makers use it to plan a calm work session with simple steps. Teams use it to share a common process across a group. New learners use it to avoid missing key steps. It also helps track a short practice session from start to finish. It can support a simple checklist for tools and tasks. It can also help plan material use and time. In each case the diagram keeps the flow easy to follow and easy to repeat.
How to generate the blueprint anvil chart
To generate the blueprint anvil diagram, open the home page generator and choose a flowchart template. Write a prompt that lists each step in order, such as set up tools, prepare material, shape the piece, check the form, and finish. Use short words so each box is easy to read. Ask for clear arrows and simple shapes to show the flow. Add a short title and request soft colors to keep the mood calm. After you submit, review the result and adjust the prompt if a step is missing. You can add a check step for safety and shape. You can add a note for clean up and storage. You can add a final review step before the finish. A few updates will make the diagram simple and easy to share.
Similar Prompt Examples
Use these prompt ideas to keep the plan clear and calm.
Create a flowchart for blueprint anvil with steps for tool setup, material prep, shaping, check step, and calm finish using short labels.
Make a hand drawn diagram for blueprint anvil that uses simple boxes and arrows with a centered title and soft colors.
Build a session flow for blueprint anvil that shows a clear start and end with five short steps.
FAQs
Q: What does the diagram show A: It shows a simple craft flow from start to finish.
Q: Do I need special tools A: No the diagram works for any simple setup.
Q: Can I change the steps A: Yes you can adjust the order as needed.
Q: Should the labels be short A: Yes short labels keep the flow clear.
Q: Why use a diagram A: It makes the process easy to follow.
Similar Links
1. ASMR Massage Relaxing Session
2. asmr keyboard sound pattern chart
3. Sleep Stages Throughout the Night